
Next.js 14 with Google Sheets (The Easy Way)
Easily integrate Google Sheets with Next.js 14 using Google Apps Script. Follow our step-by-step guide to set up a dynamic and interactive application.
Sometimes, you just need to save some data into Google Sheets quickly and efficiently without going through the hassle of setting up Google’s Sheets API and SDK. If you’re looking for a fast and straightforward way to handle data storage in your Next.js 14 application, then this tutorial is for you!
In this guide, we’ll explore how to integrate Google Sheets with a Next.js 14 application. This powerful combination allows you to use Google Sheets as a simple backend for storing and retrieving data, making your Next.js application more dynamic and interactive.
Setting Up Google Sheets and Apps Script
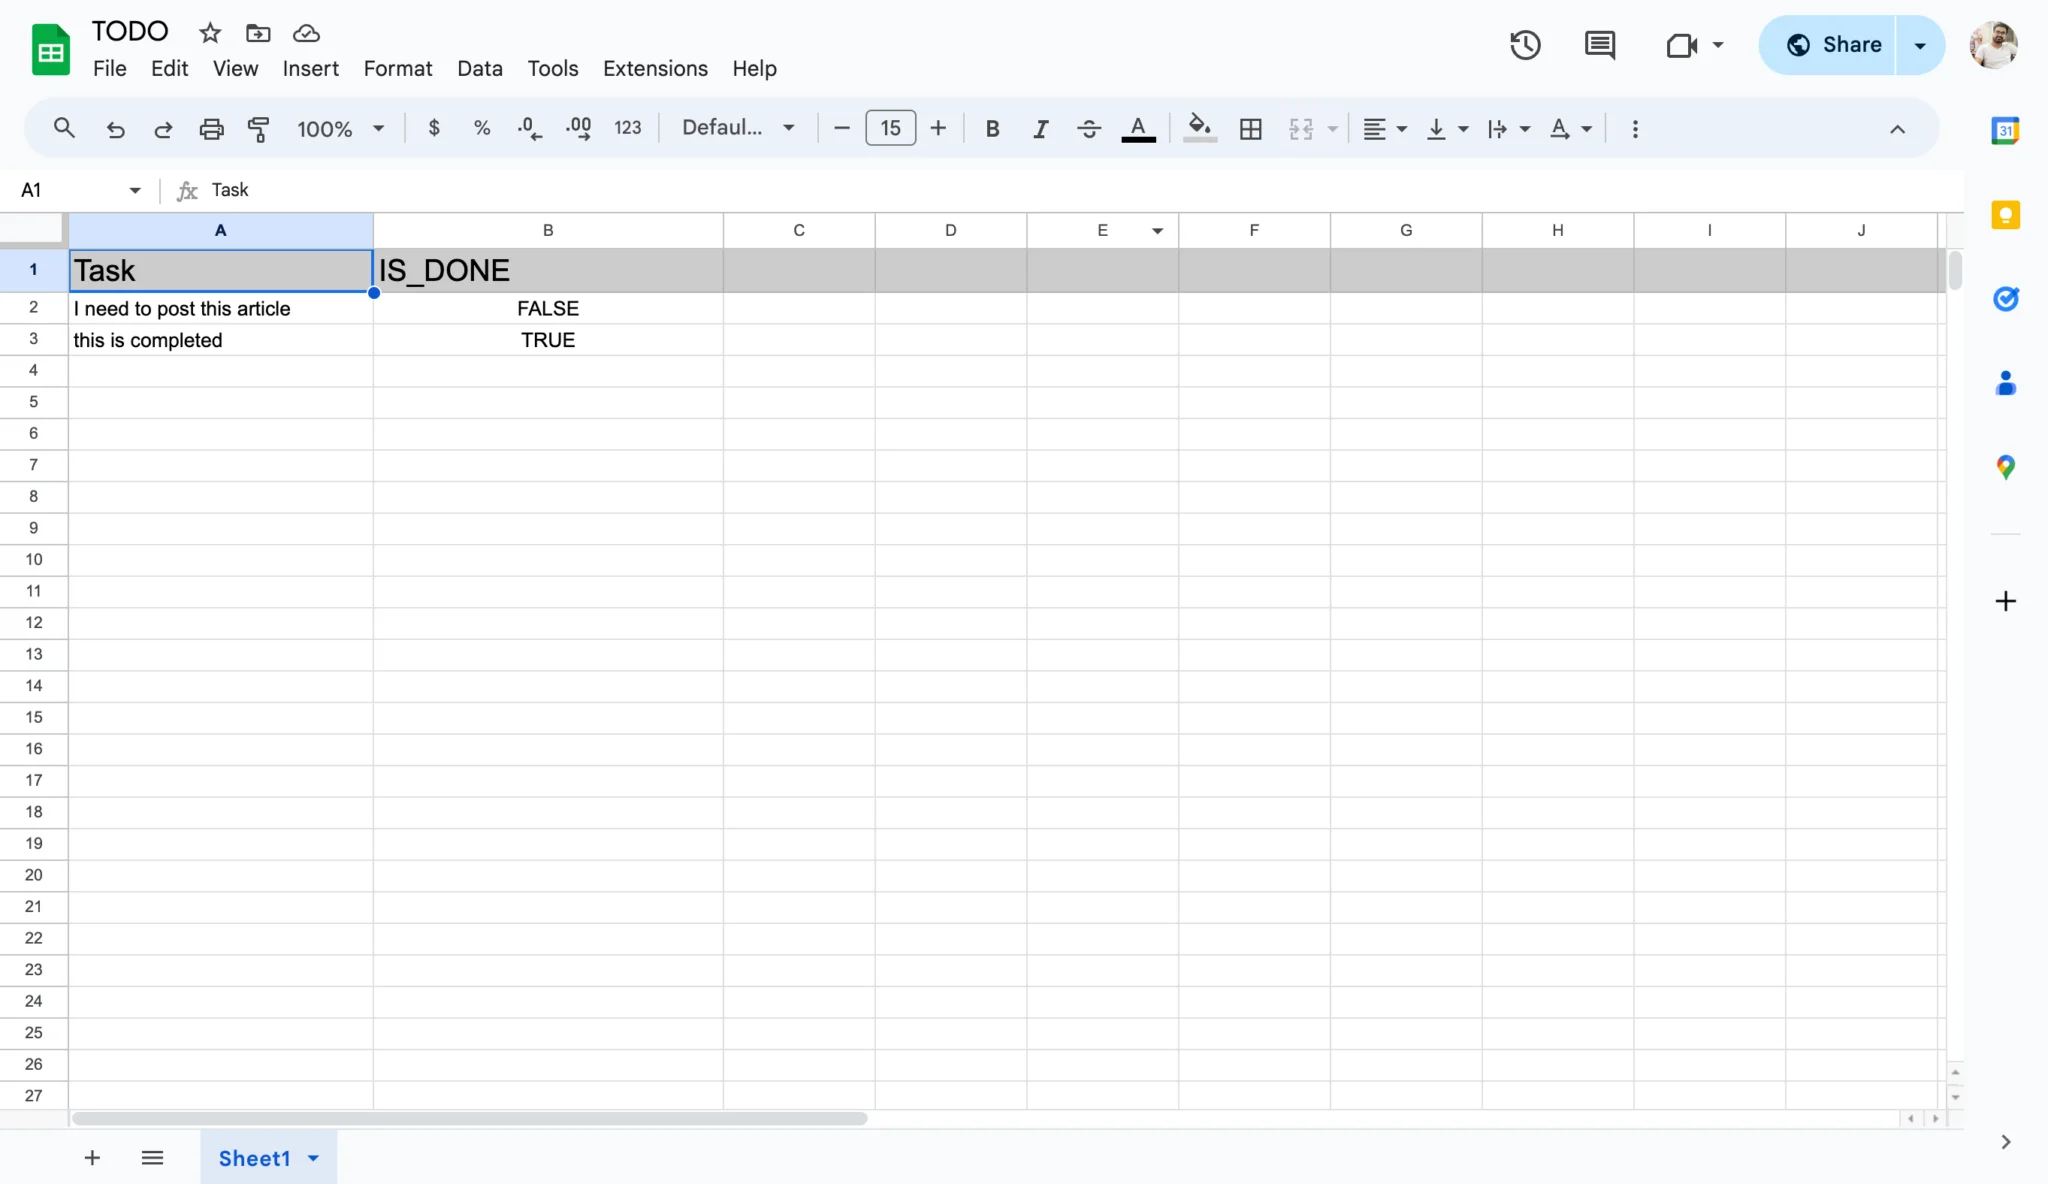
Step 1: Create a Google Sheet
- Open Google Sheets and create a new spreadsheet.
- Rename the first sheet to TODO for easy reference.
- Add headings:
TaskandIS_DONE.
Step 2: Create an Apps Script
- Click on Extensions in the menu and select Apps Script.
- Replace the default code with the following script.
const sheets = SpreadsheetApp.openByUrl("https://docs.google.com/spreadsheets/d/<UniqueId>/edit?gid=0#gid=0");
//if you have changed your sheet name then replace the below Sheet1 with your sheet name
const sheet = sheets.getSheetByName("Sheet1");
function doGet(e) {
var data = sheet.getDataRange().getValues();
return ContentService
.createTextOutput(JSON.stringify({
status: true,
message: "Fetched Successfully.",
data
}));
}
function doPost(e) {
const { task, is_done } = e.parameter;
sheet.appendRow([task, is_done]);
return ContentService
.createTextOutput(JSON.stringify({
status: true,
message: "Saved Successfully.",
data: e.parameter
}));
}- Replace
<UniqueId>with your sheet’s unique ID. - Save the script and deploy it as a web app.
- Click on Deploy > New Deployment.
- Select Web app and set the permissions to Anyone.
- Copy the Web app URL for use in your Next.js project.
Setting Up the Next.js 14 Application
Step 1: Create a New Next.js Project
- Open your terminal and create a new Next.js project:
npx create-next-app@14 google-sheets-nextjs
cd google-sheets-nextjsStep 2: Create API Functions
- Create a file
lib/api.tsand add the following code to handle API requests:
const API_URL = 'https://script.google.com/macros/s/<id>/exec';
export interface ITodo {
task: string,
is_done: boolean
}
export const fetchData = async (): Promise<ITodo[]> => {
try {
const response = await fetch(API_URL);
if (!response.ok) {
throw new Error('Network response was not ok');
}
const data = await response.json();
return data.data as ITodo[];
} catch (error) {
console.error('Error fetching data:', error);
return [];
}
};
export const addData = async (payload: FormData): Promise<ITodo[]> => {
try {
const response = await fetch(API_URL, {
method: "POST",
body: payload
});
if (!response.ok) {
throw new Error('Network response was not ok');
}
const data = await response.json();
return data.data as ITodo[];
} catch (error) {
console.error('Error adding data:', error);
return [];
}
};- Replace
<id>with your Web app ID from Apps Script.
Building the Frontend
Step 1: Create a Data Display Component
- Create a file
components/Todo.tsx.
import React from "react";
const Todo = ({ todos }: { todos: any[] }) => {
return (
<div>
{todos.length === 0 ? (
<p className="text-gray-500">No tasks found.</p>
) : (
<ul className="space-y-2">
{todos.slice(1).map(([task, is_done], index) => (
<li key={index} className="p-2 border border-gray-300 rounded">
<span className={`task ${is_done ? "line-through" : ""}`}>
{task}
</span>
</li>
))}
</ul>
)}
</div>
);
};
export default Todo;Step 2: Fetch Data and Display in Home Page
- Update the
app/page.tsx.
"use client";
import { useEffect, useState } from "react";
import { addData, fetchData, ITodo } from "./api";
import Todo from "./components/Todo";
export default function Home() {
const [todos, setTodos] = useState<any[]>([]);
const [form, setForm] = useState<ITodo>({
task: "",
is_done: false
});
const [loading, setLoading] = useState(false);
useEffect(() => {
const getData = async () => {
setLoading(true);
try {
const data = await fetchData();
setTodos(data);
} catch (error) {
console.error("Error fetching data:", error);
} finally {
setLoading(false);
}
};
getData();
}, []);
const handleSubmit = async (e: any) => {
e.preventDefault();
setLoading(true);
try {
const formData = new FormData();
formData.append('task', form.task);
formData.append('is_done', form.is_done ? 'true' : 'false');
await addData(formData);
const updatedData = await fetchData();
setTodos(updatedData);
setForm({ task: "", is_done: false });
} catch (error) {
console.error("Error adding data:", error);
} finally {
setLoading(false);
}
};
return (
<div className="mx-auto p-4 container">
<h1 className="mb-4 font-bold text-2xl">Next.js 14 with Google Sheets</h1>
<Todo todos={todos} />
{loading && (
<div className="fixed inset-0 flex justify-center items-center bg-gray-100 bg-opacity-50">
<div className="bg-white shadow-md p-4 rounded">Loading...</div>
</div>
)}
<form onSubmit={handleSubmit} className="mt-4">
<div className="flex flex-col space-y-2">
<input
type="text"
value={form.task}
onChange={(e) => setForm({ ...form, task: e.target.value })}
placeholder="Task"
className="p-2 border border-gray-300 rounded w-full"
/>
<label className="flex items-center space-x-2">
<input
type="checkbox"
checked={form.is_done}
onChange={(e) => setForm({ ...form, is_done: e.target.checked })}
className="form-checkbox"
/>
<span className="text-sm">Completed</span>
</label>
<button
type="submit"
className="bg-blue-500 p-2 rounded text-white"
disabled={loading}
>
Add Task
</button>
</div>
</form>
</div>
);
}- Update
gloabl.css.
@tailwind base;
@tailwind components;
@tailwind utilities;Now run npm run dev
and open http://localhost:3000/
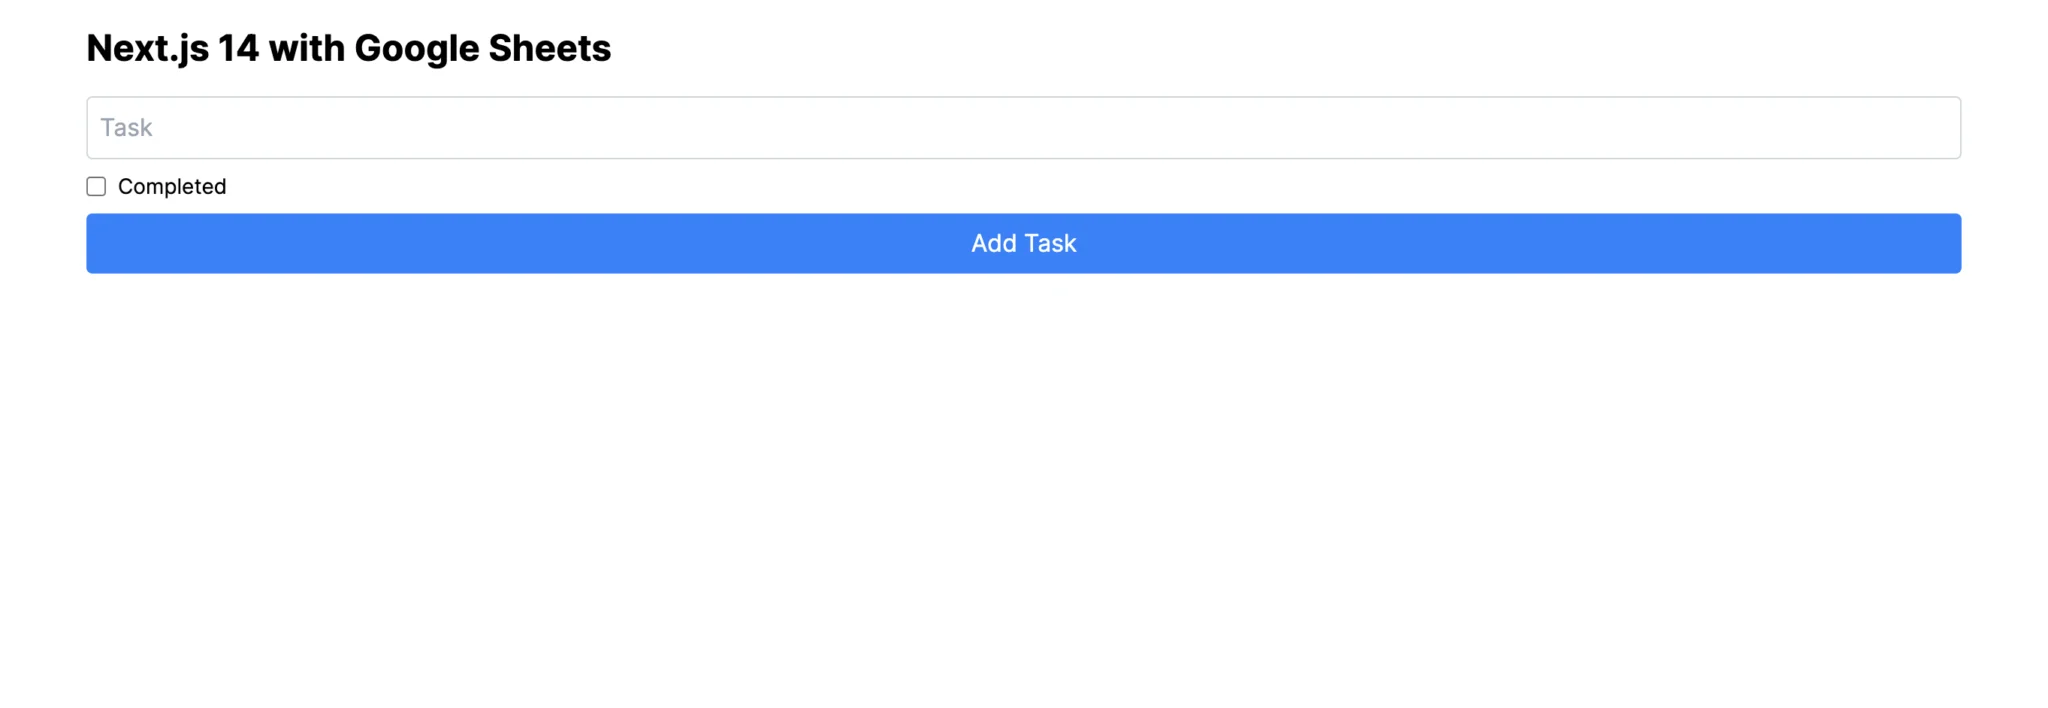
It should look like something this.
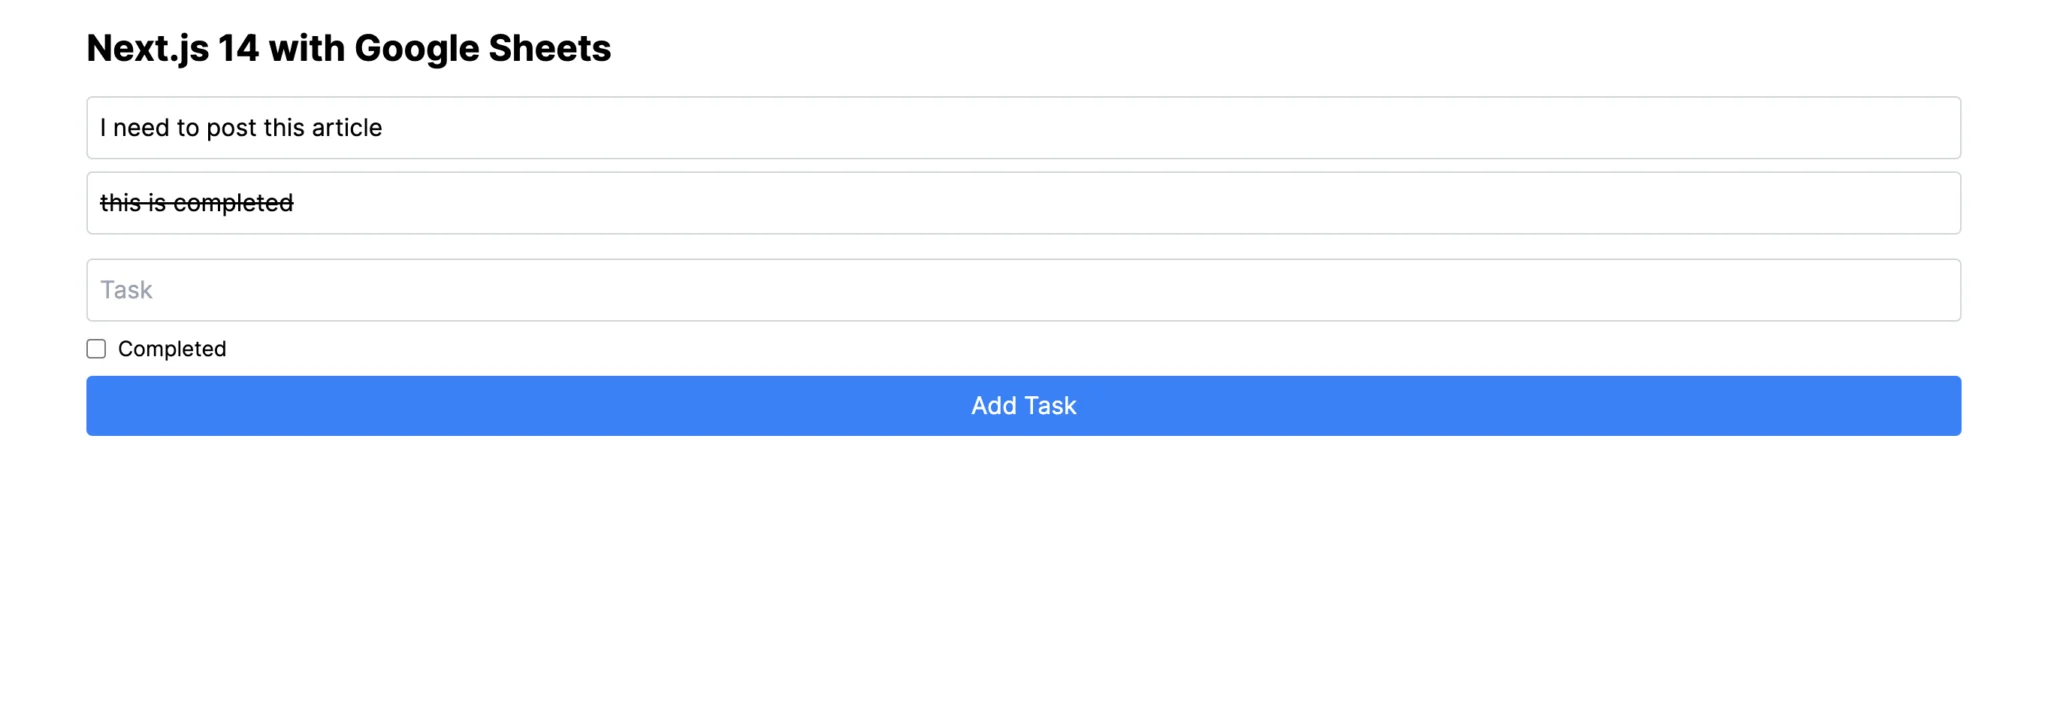
It will add data realtime like below.
Your app should look like this
Conclusion
By following these steps, you’ve successfully integrated Google Sheets with a Next.js 14 application using Google Apps Script.